Plunge Pools Gold Coast helps homeowners across the Gold Coast design and build beautiful plunge pools. With years of experience and a commitment to quality, we provide expert advice and services to build your dream plunge pool.
This guide is based on common challenges and solutions drawn from real DIY plunge pool projects across the Gold Coast. Whether you’re an experienced builder or new to home improvement, these step-by-step insights can help you navigate planning, permits, construction, and finishing successfully.
Key Takeaways:
- DIY is possible: With careful planning and the right tools, you can build your own inground plunge pool.
- Permits are required: Pools deeper than 300 mm in Queensland need council approval and certified fencing.
- Follow a clear build process: Prepare the site, pour the foundation, build walls, install plumbing/electrical, then finish the interior.
- Waterproof properly: Use sealants, membranes, or waterproof concrete to prevent leaks and moisture damage.
- Use licensed professionals when needed: Electrical and plumbing work must be done by certified trades.
What an Inground Plunge Pool Is
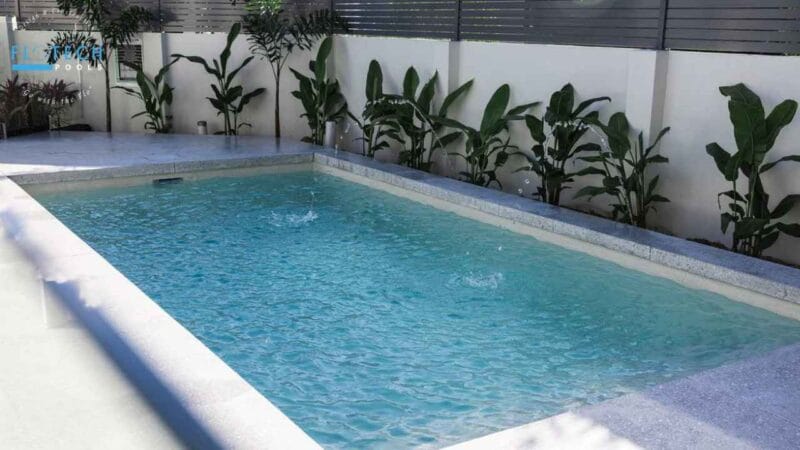
An inground plunge pool is a compact, fully recessed swimming pool specifically engineered for small outdoor environments. Typically ranging from 1.2 to 1.5 metres in depth, it offers excellent utility for hydrotherapy, light exercise, or casual relaxation. In contrast to full-sized pools, plunge pools occupy significantly less space, involve lower setup costs, and demand minimal ongoing upkeep making them increasingly popular among homeowners in urban areas and those with limited yard dimensions.
Moreover, these pools can be tailored to fit individual preferences using materials such as concrete, fibreglass, or vinyl. Many designs incorporate enhancements like spa jets, underwater lighting, and heating systems to elevate both function and aesthetics. As a result, inground plunge pools represent a highly adaptable and efficient solution for enhancing outdoor living spaces.
Benefits of an Inground Plunge Pool
- Space-Saving Design: Perfect for small or limited outdoor spaces.
- Cost-Effective: More affordable to install and maintain than full-sized pools.
- Customisable: Can include features like jets, heating, or LED lighting for added functionality and style.
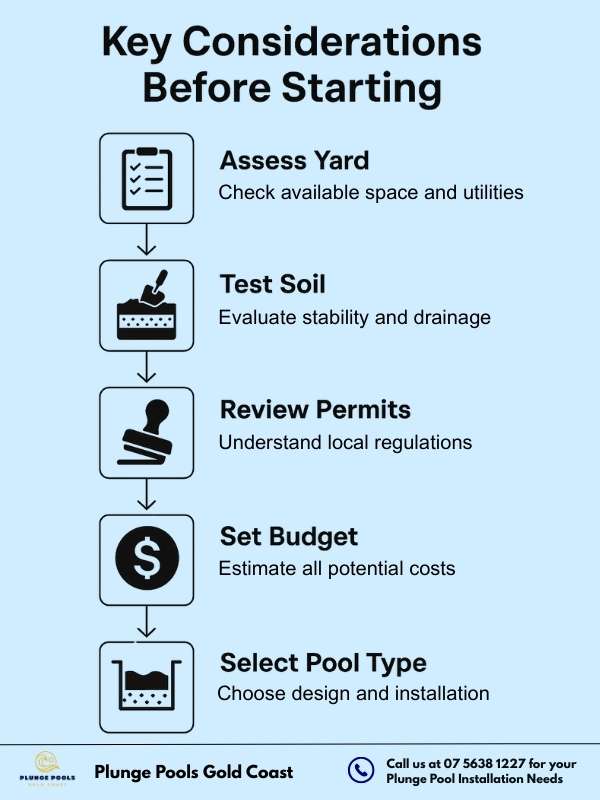
Key Considerations Before Starting
Planning your DIY plunge pool project is the foundation of success. Evaluate important factors such as yard size, soil type, and drainage. Ensure you review local regulations, secure permits, and set a realistic budget before breaking ground to avoid delays or complications:
1. Assess Your Yard
- Check the available space and soil condition.
- Locate utilities and ensure proper drainage options.
- Plan for proximity to water and power sources.
2. Soil and Site Assessment
Before starting a DIY plunge pool project, it’s vital to understand your property’s soil conditions and site characteristics. Soil type, drainage, and even the groundwater level all affect long-term pool stability. Skipping this step can lead to expensive issues like structural cracks, shell movement, or persistent waterlogging. Here’s how to prepare your site the right way:
1. Conduct a Soil Test
Different soils such as clay, sand, or loam have unique drainage and load-bearing abilities. Clay often holds water and expands when wet, while sandy soil drains fast but can shift under pressure.
- DIY Texture Test: Roll a moist handful of soil into a ribbon. If it sticks, it’s clay. If it crumbles, it’s sandy. Loam feels gritty but soft and holds shape lightly.
- Professional Soil Report: For best results, engage a geotechnical engineer or soil testing company. A report usually covers:
- Bearing capacity – whether the soil can support a pool shell.
- Permeability – how efficiently water drains through the ground.
- Reactivity index – shrink-swell risk that may damage pool footings.
- Compaction levels – density of fill material if your yard has been built up.
Cost guide: In Queensland, a basic geotechnical report costs around $300–$600 AUD.
2. Check Drainage and Water Table
The natural slope of your yard should direct surface water away from the pool. Avoid digging into a high water table (groundwater close to the surface), as this can cause “pool float” or cracking unless special drainage systems like sump pumps or subsoil drains are installed.
Tip: After heavy rain, walk the site. If water stays pooled longer than 24 hours, your soil needs drainage remediation.
3. Stabilise Unstable Soil
If soil conditions aren’t suitable:
- Loose sand – stabilise using compacted gravel or engineered fill.
- Highly reactive clay – add deep footings, screw piles, or piers to resist movement.
- Sloping blocks – may require retaining walls or site levelling.
4. Meet Queensland Compliance
In Queensland, owner-builders must follow the Queensland Development Code MP 3.4 and Australian Standard AS 2870 (Residential slabs and footings). These documents guide site classification, footing design, and ensure your project meets council approval requirements. This step is critical if you’re lodging a development application.
3. Understand Local Regulations
- Obtain necessary council permits.
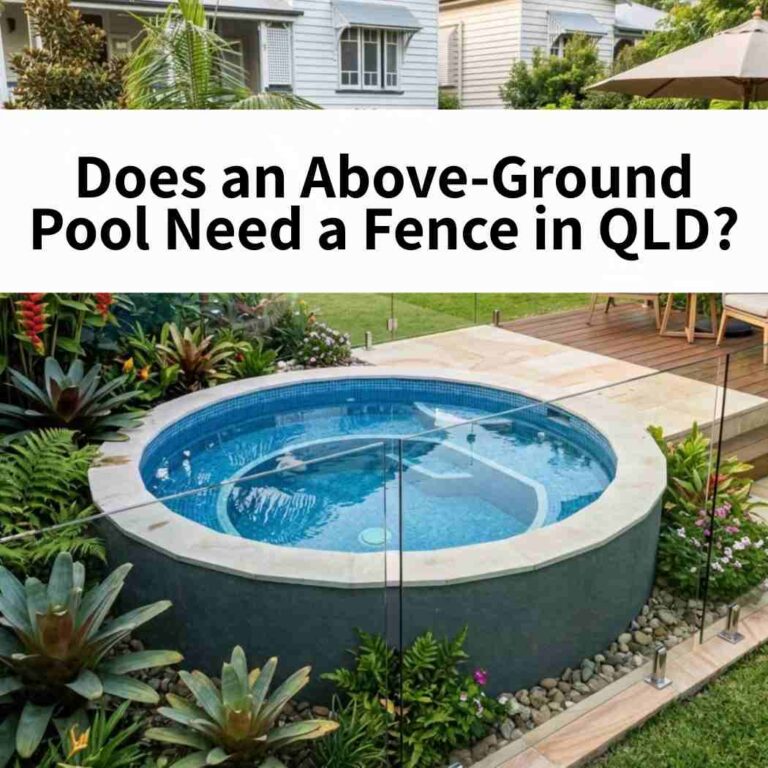
- Ensure compliance with safety laws, including fencing and gate requirements.
Council Permit Guidelines for DIY Plunge Pools in Queensland
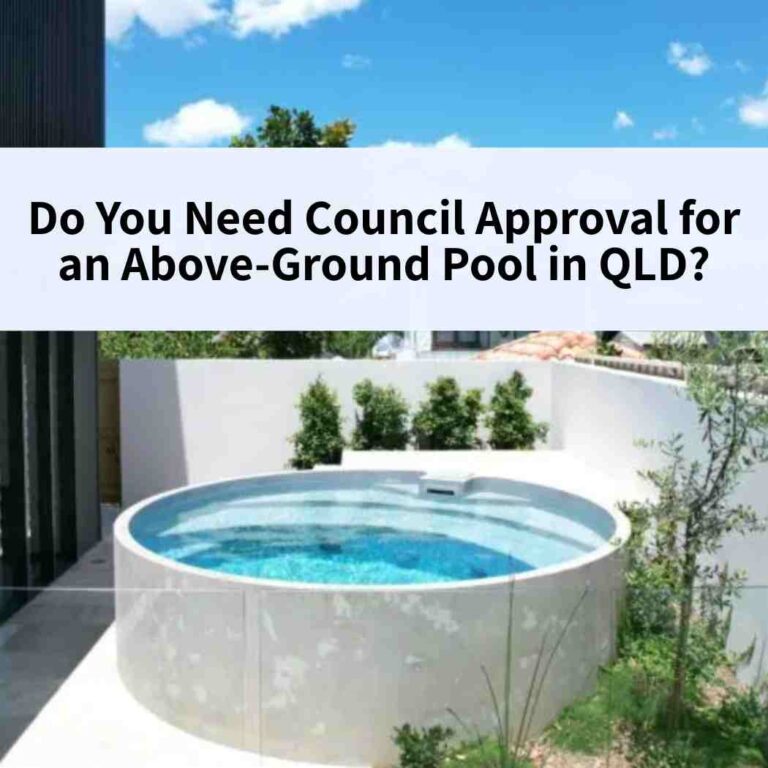
Before building a DIY plunge pool in Queensland, you must follow local council regulations and building approval laws. These rules, set by the Queensland Building and Construction Commission (QBCC) and the Building Act 1975 (Qld), are designed to keep pools safe and compliant. Ignoring them could mean hefty fines, stop-work orders, or even being forced to remove your pool.
1. Do You Need Building Approval?
In Queensland, any pool deeper than 300 mm is legally considered a regulated structure. That means:
- A building approval from a licensed private certifier or council.
- Mandatory pool fencing that meets Australian Standard AS1926.1 – Safety Barriers for Swimming Pools.
- Pool registration with the Queensland Pool Safety Register, which is maintained by the QBCC.
Exemptions (always confirm with your local council):
- Temporary or inflatable pools under 300 mm in depth.
- Above-ground spas with lockable child-safety covers, which may not need separate fencing.
2. The Application Process
Getting approval is a formal step-by-step process:
- Hire a Private Building Certifier – Only licensed certifiers under the Queensland Building Regulation 2021 can approve plunge pools. You’ll need to provide site plans, structural engineering drawings, and fencing details.
- Submit Documents – Applications can go through your certifier or the council’s online lodgement portal.
- Inspection Stages – Approvals usually require staged inspections, including:
- After excavation.
- After steel reinforcement, but before the concrete pour.
- A final safety inspection once the pool and fencing are installed.
3. Timelines and Costs
| Requirement | Estimated Timeframe | Typical Cost (AUD) |
|---|---|---|
| Private Certifier Engagement | 1–3 business days | $500–$1,200 |
| Building Approval Processing | 5–10 business days | Included in certifier fee |
| Final Safety Inspection & Certificate | 3–5 business days | $150–$300 |
| Pool Registration (QBCC) | Immediate (online) | Free |
Note: Costs and processing times may differ depending on your local government area, your certifier, and how complete your application is.
4. Extra Compliance Tips
- If acting as an owner-builder, any pool or structural work valued over $11,000 requires an Owner Builder Permit from the QBCC.
- Councils may also check for compliance with the Queensland Development Code MP 3.4 (for residential construction).
- Always confirm zoning, site setbacks, and plumbing approvals with your local planning department before excavation.
Before starting, make sure you’ve obtained the correct permits and fencing approvals. Understanding pool safety requirements in Australia will help you avoid compliance issues later.
Unsure About Permits? Book a Consultation4. Set a Realistic Budget
- Consider material, equipment, and tool costs.
- Account for unexpected expenses like soil removal or equipment hire.
5. Choose Your Pool Type
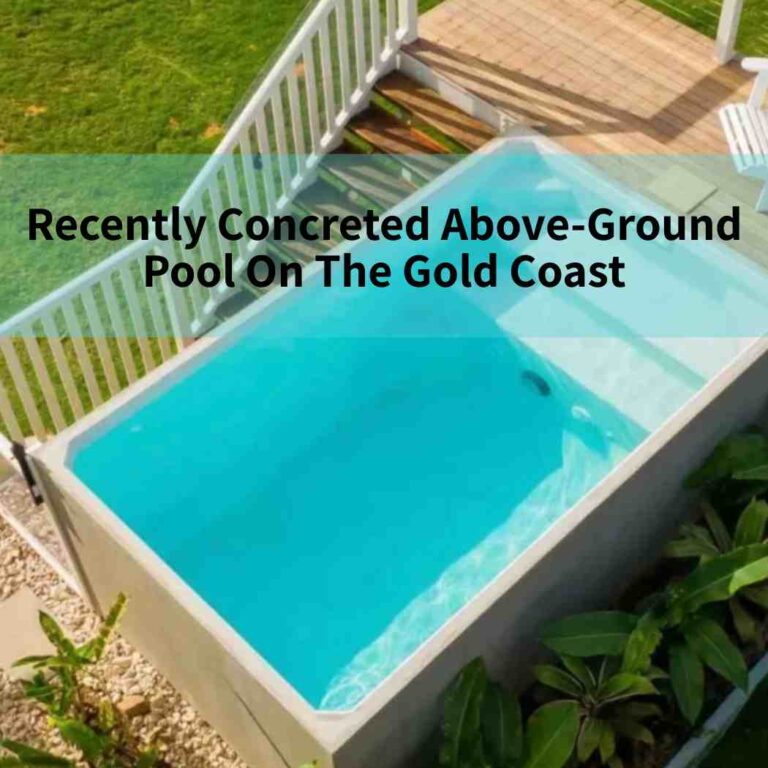
- Inground: This type of pool offers a sleek, seamless look.
- Semi-Inground: Easier to install, especially on sloped land.
- Above Ground: Cost-effective and quicker to build.
Designing Your Perfect Plunge Pool
Creative Shape and Size Ideas
- Compact rectangles for modern aesthetics.
- Circular designs for a classic look.
- Freeform shapes for a natural, lagoon-style feel.
Modern Finishes
- Tiled Interiors: Glossy mosaics or matte finishes.
- Natural Stone: Timeless and durable.
- Plastered Surfaces: Affordable and sleek.
Landscaping Integration
- Surround with greenery for a tropical vibe.
- Add decking or paving for functionality.
- Use lighting for ambiance and safety at night.
Tools for Visualisation
- Try free 3D pool design software to map out your ideas before committing.
Materials and Tools Checklist
Recommended Materials
- Concrete: Durable and versatile for custom designs.
- Fibreglass: Low-maintenance and pre-shaped.
- Vinyl Liner: Budget-friendly but requires regular replacement.
Essential Tools
- Shovels, wheelbarrows, and excavation equipment.
- Concrete mixers, waterproofing solutions, and tile adhesive.
- Plumbing tools for pipework and filtration systems.
Eco-Friendly Options
- Recycled concrete or composite materials.
- Solar-powered filtration and heating systems.
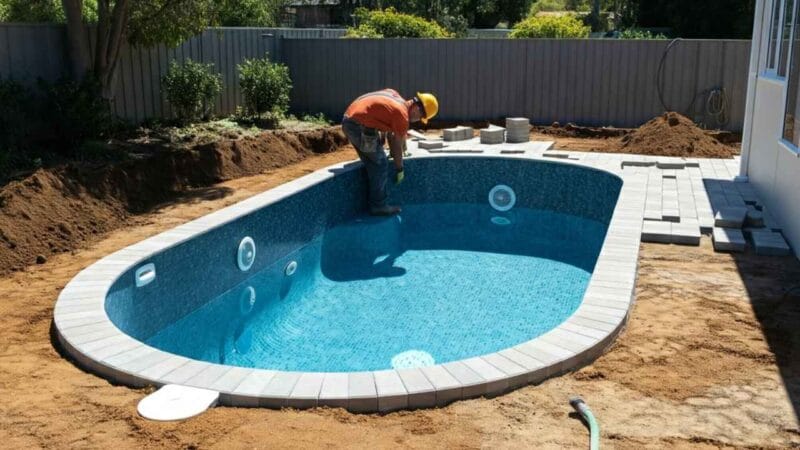
Building Your DIY Inground Plunge Pool
Step 1 – Site Preparation and Excavation
Preparing the site is the first step in building your in-ground plunge pool. Proper site preparation ensures the pool remains stable, functional, and free from issues like uneven settling or drainage problems.
1. Clear the Area
- Remove grass, rocks, and debris from the selected location.
- Use stakes and string to mark the pool’s outline, ensuring the shape and size align with your design.
2. Check the Ground
- Test the soil for stability. Address loose sand or clay by adding stabilisation materials if needed.
- Confirm the area is level using a spirit level.
3. Excavation
- Equipment Options:
- Wet Hire: Rent an excavator with a professional operator for accuracy and speed.
- Dry Hire: Rent the equipment and operate it yourself if experienced.
- Carefully dig within the marked outline, maintaining the correct depth and shape.
- Dispose of excess soil responsibly or use it for landscaping projects.
Pro Tips:
- Avoid over-digging as it is easier to remove soil later than refill it.
- Install temporary safety fencing around the site, as required by local Australian regulations.
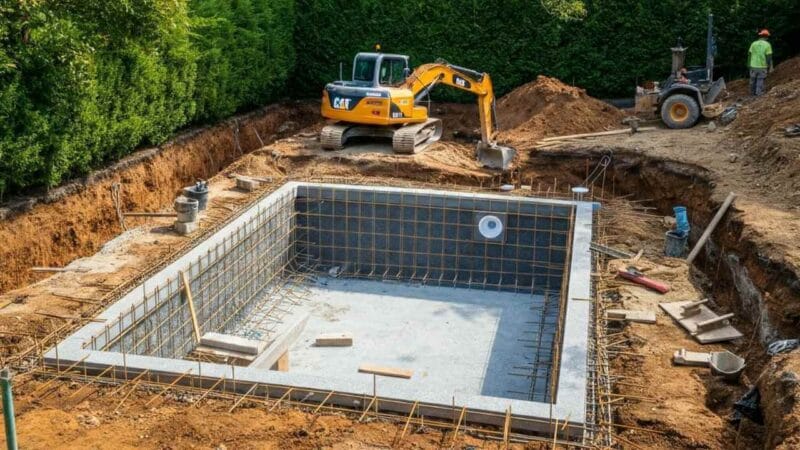
Step 2 – Laying the Foundation
The foundation is crucial to ensuring your plunge pool remains stable and free of structural issues like cracks or leaks.
1. Prepare the Base
- Lay a 10 cm (4-inch) layer of compacted gravel at the bottom of the excavation.
- This creates a solid, stable surface for the concrete.
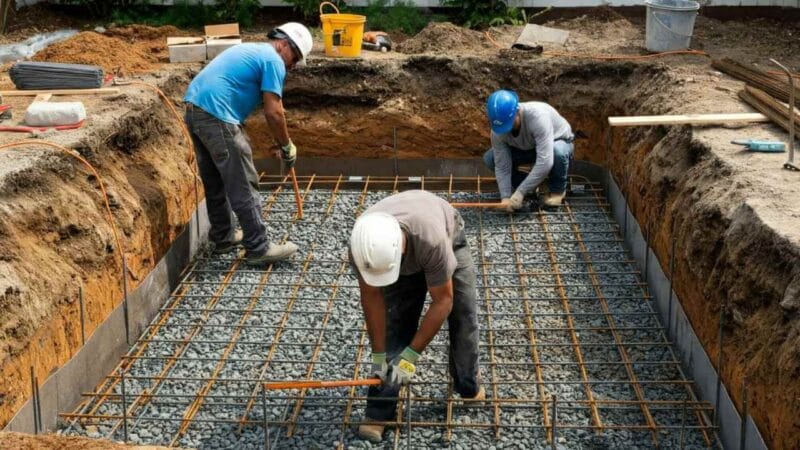
2. Add Rebar for Reinforcement
- Place steel rebar in a grid pattern over the gravel for added strength.
- Use rebar chairs to elevate the grid slightly, allowing concrete to flow underneath.
3. Pour the Concrete Pad
- Mix and pour concrete evenly over the gravel and rebar.
- Use a trowel to smooth the surface, ensuring it’s level and even.
- Allow the concrete to cure completely (2–3 days) before proceeding to the next step.
Step 3 – Constructing the Pool Walls
The pool walls form the structure and can be built using concrete, bricks, blocks, or prefabricated panels.
1. Concrete Walls
- Build wooden forms around the pool perimeter.
- Pour concrete into the forms, ensuring even distribution and no air pockets.
- Remove the forms after the concrete cures (1–2 days).
2. Brick or Block Walls
- Lay bricks or concrete blocks on the foundation, securing each layer with mortar.
- Backfill any gaps with additional concrete for stability.
3. Prefabricated Panels
- Follow the manufacturer’s installation instructions to assemble the panels.
- Secure the panels with bolts or brackets for long-term durability.
Waterproofing the Walls
- Apply a waterproof render or sealant to the walls to prevent leaks.
- Inspect for weak spots or cracks and address them before moving forward.
Step 4 – Plumbing and Filtration Installation
Proper plumbing ensures water circulates effectively, keeping your plunge pool clean and safe.
1. Install Drainage and Filtration Systems
- Position pool drains at the bottom to promote efficient water flow.
- Connect skimmers and return jets to the filtration system for debris removal and water circulation.
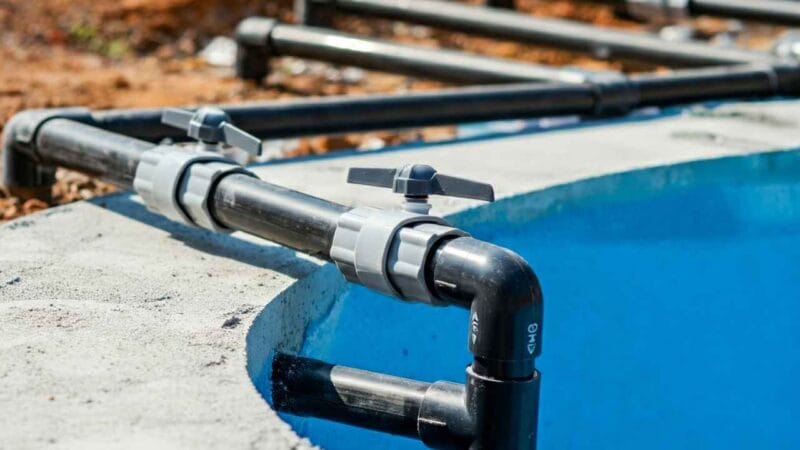
2. Pipework
- Use durable PVC pipes designed for swimming pools, ensuring all joints are sealed tightly.
- Include plumbing for additional features like spa jets, waterfalls, or heating systems, if required.
3. Electrical Setup
- Run electrical cables for lights, pumps, and heaters as needed.
- Engage a licensed electrician to handle wiring and ensure compliance with Australian safety standards.
Step 5 – Finishing the Interior
The interior finish enhances the pool’s appearance and provides a waterproof layer.
1. Apply Plaster or Epoxy Paint
- Use a plaster coating to create a smooth and waterproof surface.
- Alternatively, apply epoxy paint for a long-lasting, vibrant finish.
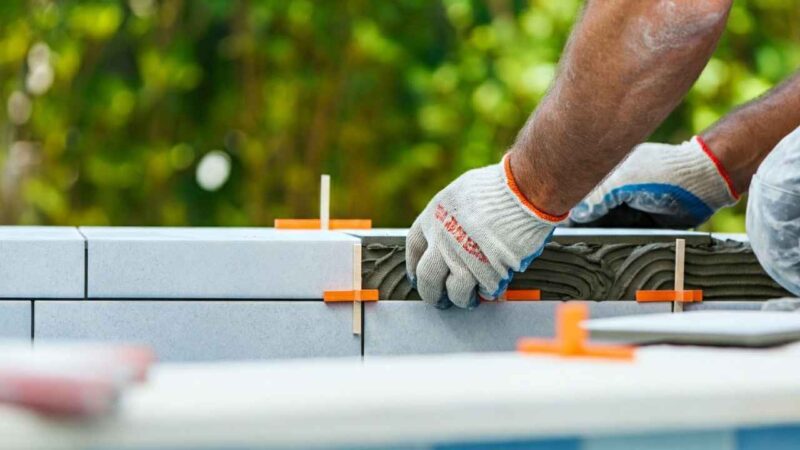
2. Tile the Pool (Optional)
- Select water-resistant tiles for a premium look.
- Apply tile adhesive evenly and grout carefully, filling gaps for a uniform surface.
3. Let It Cure
- Allow the plaster, paint, or tiles to cure fully as per manufacturer instructions before filling the pool with water.
Enhancing Your DIY Plunge Pool
Once your plunge pool is built, thoughtful additions like a well-designed deck around your pool can elevate its appeal and functionality. Combine stylish decking with comfortable seating and ambient lighting to create a luxurious backyard escape that enhances your lifestyle and adds value to your home.
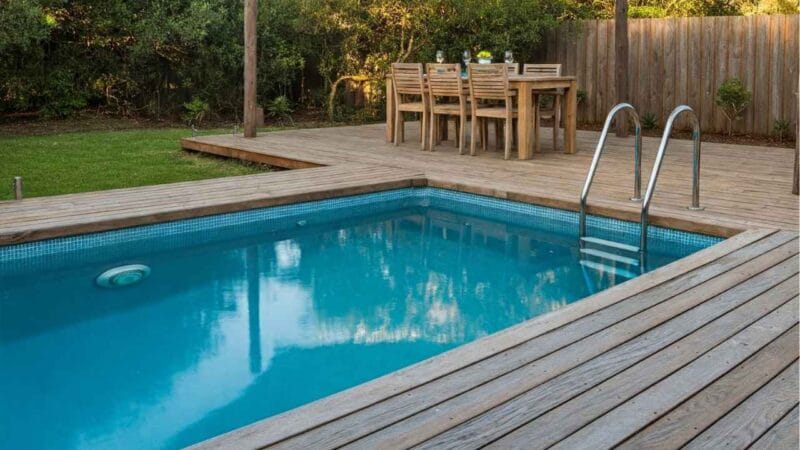
1. Decking Options
- Wood Decking: Provides a natural, warm aesthetic. Ensure the wood is treated for water resistance.
- Composite Decking: Durable and low maintenance, making it ideal for outdoor use.
- Concrete or Stone Pavers: Perfect for a modern, sleek look with added slip resistance.
2. Seating and Shade
- Seating: Add sun loungers, built-in benches, or outdoor chairs for comfort and relaxation.
- Shade: Protect yourself from the harsh Australian sun with pergolas, shade sails, or large umbrellas.
3. Lighting Ideas
- Underwater Lights: Install LED lights to create a magical ambiance at night.
- Pathway Lighting: Use solar-powered fixtures to illuminate walkways and highlight landscaping.
- Deck Lighting: Add recessed lights for both safety and style.
Adding Eco-Friendly Features
1. Solar Heating Systems
- Install rooftop solar panels to naturally warm your pool and reduce energy costs.
2. Saltwater Chlorination
- Use a saltwater system for gentler water that is kinder to skin and eyes.
- Reduces the need for frequent chemical adjustments.
3. Energy-Efficient Pumps
- Use variable-speed pumps that adjust power according to pool use, saving electricity.
4. Water-Saving Techniques
- Use a pool cover to minimise evaporation.
- Install a water recirculation system to reduce waste during cleaning.
Customising for Fitness and Relaxation
Your plunge pool can be tailored to support exercise, relaxation, and aesthetic appeal.
1. Exercise Features
- Install resistance jets for swimming or water-based workouts in a compact space.
- Add grab bars or steps for accessibility and low-impact exercises.
2. Relaxation Elements
- Integrate spa jets in one section for therapeutic hydrotherapy.
- Install a heating system to enjoy your pool comfortably all year round.
3. Landscaping for Tranquillity
- Surround your pool with native Australian plants to create a lush, low-maintenance tropical vibe.
- Add features like small waterfalls or fountains for soothing sounds and visual appeal.
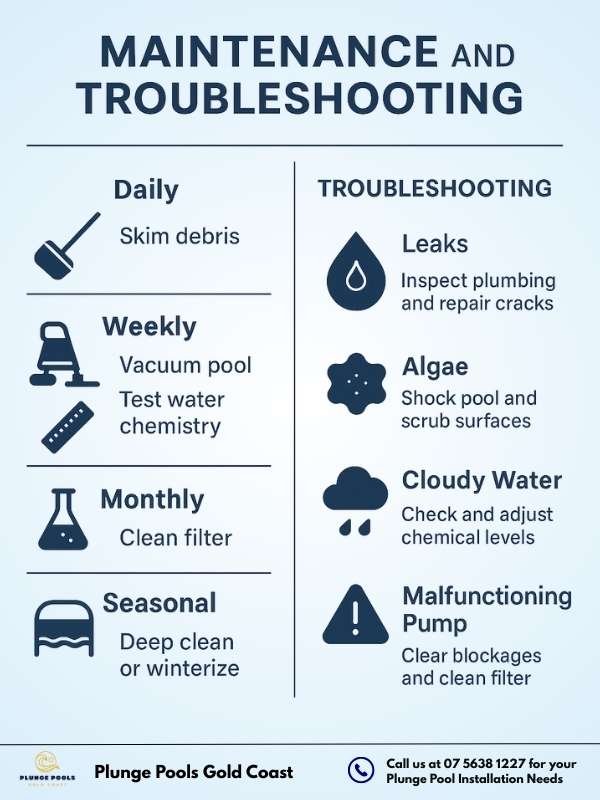
Maintenance and Troubleshooting
Regular maintenance keeps your plunge pool clean, safe, and long-lasting while reducing the need for expensive repairs.
1. Essential Cleaning Tools
- Skimmers: Remove floating debris like leaves and bugs daily.
- Pool Vacuums: Clean the floor and walls weekly.
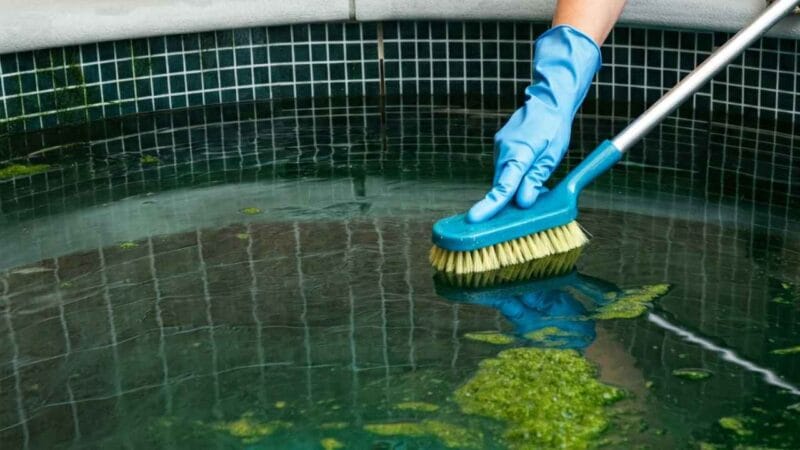
- Brushes: Scrub tiles and walls to prevent algae buildup.
2. Cleaning Schedule
- Daily: Skim the surface and empty skimmer baskets.
- Weekly: Vacuum, brush surfaces, and test water chemistry.
- Monthly: Backwash filters and inspect equipment for wear.
- Seasonal: Deep clean or drain before winterising.
Balancing Pool Chemistry
1. Key Chemical Levels
- pH Levels: Maintain between 7.2 and 7.6 for comfort and equipment protection.
- Chlorine or Sanitiser: Keep adequate levels to prevent bacteria and algae.
- Alkalinity: Stabilise pH by maintaining levels between 80–120 ppm.
- Calcium Hardness: Keep between 200–400 ppm to protect surfaces and equipment.
2. Testing and Adjusting
- Test water weekly using a reliable testing kit.
- Adjust pH, chlorine, or alkalinity with suitable chemical products as required.
- Shock the pool every 1–2 weeks to eliminate bacteria and organic contaminants.
Troubleshooting Common Issues
1. Leaks
- Symptom: Unexplained water loss beyond normal evaporation.
- Solution: Inspect plumbing, seams, and skimmer areas for cracks. Repair using waterproof epoxy or professional sealants.
2. Algae Growth
- Symptom: Green or slimy water, or visible patches on walls.
- Solution: Shock the pool, scrub affected areas, and ensure the filter system is functioning properly.
3. Cloudy Water
- Symptom: Water appears murky or unclear.
- Solution: Test and adjust pH and chlorine levels, clean filters, and ensure proper water circulation.
4. Malfunctioning Pump or Filter
- Symptom: Low water flow or ineffective debris removal.
- Solution: Check for blockages in the pump basket or filter. Clean or replace filters as required.
5. Cracked Tiles or Walls
- Symptom: Visible cracks or missing tiles.
- Solution: Repair using waterproof adhesive and grout. Seal cracks with epoxy resin to prevent further damage or leaks.
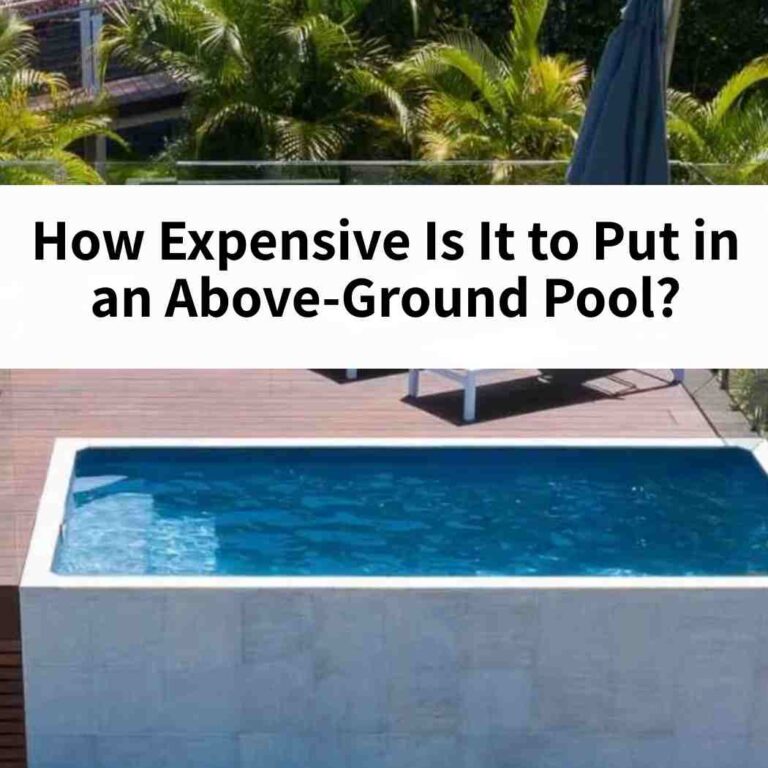
Cost Breakdown and Time Management
Understanding the expenses and time involved helps you plan and stay within budget.
1. Itemised Breakdown
| Category | Estimated Cost (AUD) | Notes |
|---|---|---|
| Excavation Equipment | $500–$2,000 | Rent wet or dry hire excavators. |
| Concrete/Materials | $2,000–$5,000 | Includes concrete, rebar, and gravel. |
| Pool Shell (Optional) | $2,500–$10,000 | Prefab fiberglass or vinyl liner. |
| Plumbing and Filtration | $1,000–$3,000 | Pumps, filters, and skimmers. |
| Electrical Work | $500–$2,000 | Hiring a licensed electrician. |
| Waterproofing and Tiles | $500–$3,000 | Varies based on materials chosen. |
| Decking and Landscaping | $1,500–$5,000+ | Wood, composite, or pavers. |
| Maintenance Tools/Chemicals | $200–$500 annually | For cleaning and water treatment. |
Many DIYers focus on tools and materials but forget to include hidden expenses like soil removal or electrical work.
Disclaimer:
The cost estimates provided are for informational purposes only and are based on general industry standards and averages. Actual costs may vary depending on location, material choices, labour rates, and specific project requirements. Always consult local professionals and suppliers for accurate quotes tailored to your project.
2. Budget-Friendly Tips
- Reuse Excavated Soil: Repurpose for landscaping to save on disposal costs.
- Shop Smart: Look for end-of-season sales on pool materials and tools.
- DIY Where Possible: Handle tasks like tiling and cleaning instead of outsourcing.
Creating a Realistic Timeline
1. Typical Project Phases
| Phase | Duration | Tasks |
|---|---|---|
| Planning and Permits | 2–4 weeks | Site evaluation, council approvals |
| Excavation and Foundation | 1–2 weeks | Digging, gravel, and concrete pad |
| Pool Walls Construction | 1–2 weeks | Building and waterproofing walls |
| Plumbing and Electrical | 1–2 weeks | Installation and system setup |
| Finishing and Curing | 2–3 weeks | Tiling, plaster, and curing time |
2. Managing Delays
- Permits: Apply early to avoid waiting on approvals.
- Weather: Plan for construction during dry seasons to avoid rain delays.
- Supply Chain: Order materials in advance to mitigate shipping disruptions.
Conclusion
Building a plunge pool is a rewarding but complex project. If you need support whether it’s reviewing your plans, sourcing quality materials, or handling parts of the build like plumbing or electrical, Plunge Pools Gold Coast offers consultations and partial or full build services.
We’re here to help you succeed. Contact us for personalised advice tailored to your site, budget, and goals.
Not sure where to start or need help with a specific part of your plunge pool project?
Our team is here to guide you, whether it’s planning, permits, or hands-on building support.
Talk to Pool Expert Today ➔People Also Ask
1. How deep should a plunge pool be?
The ideal depth for a plunge pool is 1.2 to 1.5 metres. This range is deep enough for lounging, cooling off, hydrotherapy, and gentle aquatic exercise while still being shallow enough to keep construction costs, water volume, and ongoing maintenance lower than a standard swimming pool.
2. What are the most common mistakes when building a DIY plunge pool?
The most common mistakes when building a DIY plunge pool are poor site preparation, skipping waterproofing, using unsuitable materials, and failing to secure council permits. These mistakes often lead to structural damage, water leaks, and costly repairs. Poor site preparation such as ignoring soil testing, drainage, or ground compaction, can cause the pool shell to shift or crack. Skipping waterproofing leaves concrete shells vulnerable to seepage and moisture damage. Choosing the wrong materials, like non-structural concrete or low-grade finishes, reduces durability and lifespan. Finally, not securing required building approvals, pool fencing certification, or QBCC compliance can result in fines, stop-work notices, or even pool removal.
3. Can I build a plunge pool without professional help?
Yes, you can build a plunge pool without professional help. Many owner-builders take on DIY plunge pools by handling excavation, framing, concreting, and landscaping themselves. With the right tools, materials, and planning, it is possible to complete much of the work independently. However, certain tasks such as plumbing, filtration systems, and electrical wiring should be left to licensed professionals.
4. How do I waterproof a DIY inground plunge pool?
You waterproof a DIY inground plunge pool by using waterproof concrete, applying a sealant or epoxy coating, and sealing all seams.
These steps are essential to stop leaks and protect the pool shell from moisture damage, seepage, and structural cracks. For best results:
- In high-risk soils (like reactive clay), add drainage layers or subsoil pipes around the shell to reduce external water pressure.
- Start with waterproof concrete or concrete admixtures designed to resist water penetration.
- Apply a flexible waterproofing membrane or epoxy pool coating across the entire interior surface. These coatings are formulated to withstand hydrostatic pressure and pool chemicals like chlorine.
- Seal all construction joints, pipe penetrations, and seams with specialised sealants to prevent weak points.
5. What is the difference between an inground and semi-inground plunge pool?
The difference between an inground and semi-inground plunge pool is that an inground plunge pool is fully submerged below ground, while a semi-inground plunge pool sits partially above ground. An inground plunge pool creates a seamless, level look in your backyard and is often chosen for modern landscaping where the pool blends with patios, decks, or garden surrounds.
A semi-inground plunge pool, on the other hand, is installed with part of the shell exposed above ground. This makes it easier to build on sloping or uneven blocks, reduces excavation costs, and allows for creative designs with retaining walls, raised decking, or built-in seating areas.