Ever wondered how easy it is to install a plunge pool in your backyard? Plunge pools, especially Plungie Pools, are an increasingly popular choice for homeowners who want a quick, cost-effective, and stylish addition to their outdoor space. But just how simple is the installation process? The answer is – surprisingly simple, with the right guidance and resources. With Plunge Pools Gold Coast leading the way, you’ll have your dream Plungie pool installed in no time, with expertise at every step.

In this article, we’ll walk you through what a Plungie Pool is, who can help install it, and provide a step-by-step guide for the entire installation process. Plus, we’ll cover frequently asked questions and explore the benefits of using a professional installation company like Plunge Pools Gold Coast.
What is a Plungie Pool?
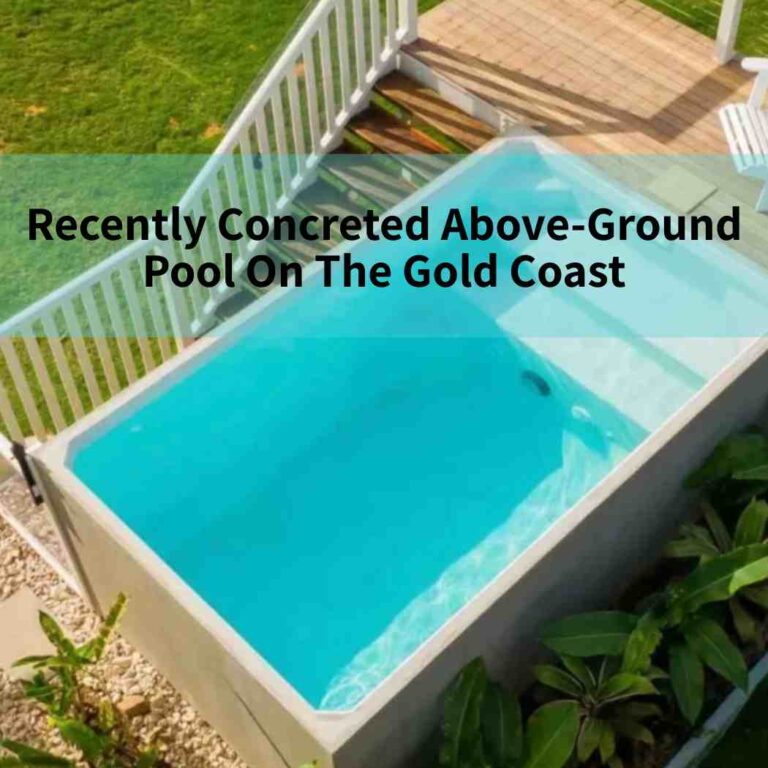
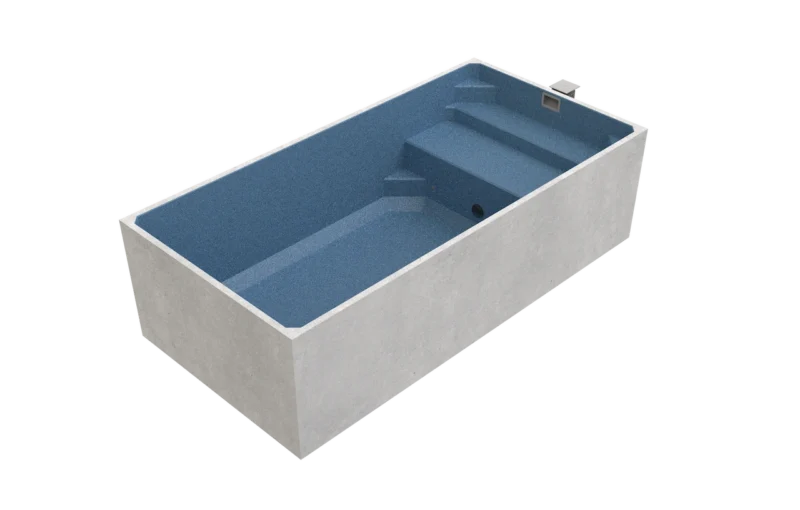
A Plungie Pool is a pre-cast concrete pool that offers all the features and luxury of a traditional pool but without the extensive build time. These pools are pre-fabricated and delivered to your site, which significantly speeds up the installation process and reduces costs compared to traditional pools. Plungie Pools are perfect for smaller backyards, providing a stylish and versatile option for homeowners who want to maximise their outdoor space.
Who can install a Plungie?
There are multiple ways you can have your Plungie Pool installed:
Plungie Partner
Plunge Pools Gold Coast works with trusted Plungie Partners who have the expertise to manage your installation from start to finish. These experts ensure everything goes smoothly, from approvals to the final plunge.
Owner-Builder
If you prefer taking matters into your own hands, you can opt for an owner-builder approach. This allows you to oversee the entire installation, but you’ll need to ensure compliance with all relevant building codes and safety requirements.
Bring Your Own Builder (BYOB)
Alternatively, you can bring in your own trusted pool builder to install the Plungie Pool. In this case, Plunge Pools Gold Coast provides the necessary guidance and support to ensure a seamless installation process.
8 Step Process to Install Plungie Pool
Now, let’s dive into the 8-step plungie install guide:
Step 1: Choose Your Plungie
Select the right Plungie model that suits your space and preferences. The models come in different sizes and shapes, allowing you to pick the one that best fits your backyard.
Step 2: Standard Building Approval
Before installing your Plungie Pool, it’s essential to get the necessary building approvals. This step involves submitting plans to your local council and ensuring all regulations are met.
Step 3: Basic Site Preparation
Preparing the site involves clearing the area, levelling the ground, and ensuring that the base is ready for the pool. Proper site preparation is crucial for a smooth installation process.
Step 4: Crane Hire
Once your Plungie Pool is ready for delivery, a crane is required to lift the pool into place. Choosing the right crane and positioning it properly is key to ensuring a safe and efficient installation.
Step 5: Electrical + Back Fill
After placing the pool, electrical connections need to be made for pool lighting, filtration systems, and other electrical components. Backfilling around the pool is then done to secure it in place.
Step 6: Standard Plumb Up
Plumbing is essential for the pool’s filtration and water circulation system. This includes connecting pipes to the filtration unit and ensuring that everything is watertight and working properly.
Step 7: Finshings + Surrounds
The finishing touches make all the difference. You can choose from a variety of customisation options for the pool surrounds, including decking, tiling, or landscaping to blend your Plungie Pool seamlessly into your outdoor space.
Step 8: Fill + Start Up
Once everything is set up, it’s time to fill your Plungie Pool with water and start it up. A final check is done to ensure all systems are functioning correctly, and soon enough, you’ll be enjoying your new oasis.
Conclusion
Installing a Plungie Pool doesn’t need to be a daunting task. By following these eight steps and working with experts like Plunge Pools Gold Coast, you can have a stunning, functional plunge pool installed quickly and efficiently. Whether you choose a Plungie Partner, act as an owner-builder, or bring your own builder, the process is streamlined and straightforward. Ready to take the plunge?
If you’re ready to start, see our Plungie Pool Costs article to get an idea of the total investment required and consult Plunge Pools Gold Coast for tailored guidance.
People Also Ask
How Plungie Pools are installed?
Plungie Pools are installed using a crane to position the pre-cast structure, followed by electrical, plumbing, and finishing steps. It’s a streamlined process designed to minimise on-site construction work.
How long does it take to install a Plungie pool?
Typically, the installation of a Plungie Pool can take anywhere from a few days to a couple of weeks, depending on factors like site preparation, weather, and approval timelines.
How Much Does Plungie Pool Installation Cost in Gold Coast?
The cost can vary based on the model you choose, site specifics, and customisation options. For an accurate estimate, it’s best to get in touch with Plunge Pools Gold Coast for a tailored quote.
What are the key steps involved in the Plungie pool installation process, from site preparation to final setup?
The key steps include choosing your pool model, gaining building approval, preparing the site, crane hire, electrical and plumbing setup, finishing touches, and finally filling the pool and startup.
How does the crane hire process work for Plungie pool installation, and what factors should be considered when planning this step?
Crane hire is needed to lift the Plungie Pool into place. Factors like crane access, space, and weight limits must be considered to ensure safe placement.
What are the electrical and plumbing requirements for installing a Plungie pool, and how are they typically addressed?
Electrical and plumbing are essential for pool functionality. Licensed electricians and plumbers are brought in to set up filtration, lighting, and ensure all safety standards are met.
How does the backfilling process work for in-ground or semi-recessed Plungie pool installations?
Backfilling involves filling the space around the pool with soil or gravel to stabilise it. Proper backfilling ensures the pool remains secure and prevents movement.
What customisation options are available for finishing and surrounds after the Plungie pool is installed?
Options include decking, tiling, landscaping, and other aesthetic features to enhance the pool area and integrate it with your backyard.
Why do you need a professional custom build company to install your plunge pool?
Working with a professional company like Plunge Pools Gold Coast ensures all installation steps are carried out safely, efficiently, and in compliance with regulations, saving you time and potential headaches.